
これまで、アプリ内文言、ブログコンテンツ、アプリ内言語切り替えを解説してきました。では、アプリ内言語を切り替えた場合に、どのように実際のWordpressブログ記事を言語に合わせて表示するかを説明します。手順としては、以下のようなものです。
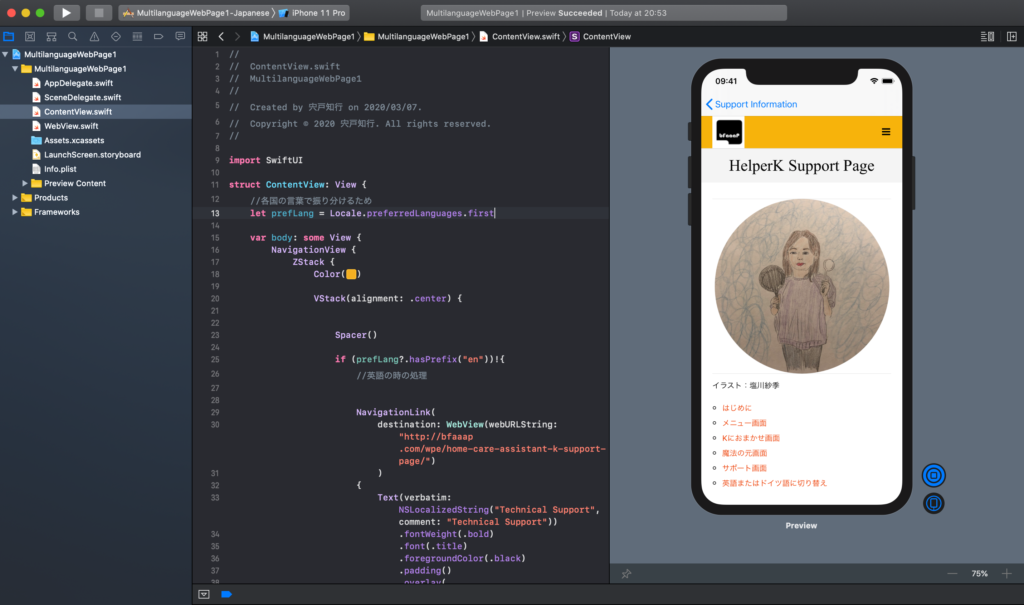
- 各国の言葉で振り分けるためLocale.preferredLanguages.firstの定数let prefLangを定義
- そのprefLangに合わせて場合分けをして処理を記載
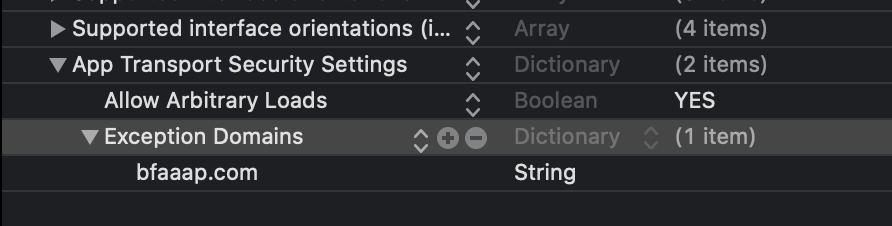
- info.plistの「App Transport Security Settings」のArbitary loadsをYesにして、実際に飛ぶURL(例、bfaaap.com)をException Domainsに追加する
- WebPageを表示するためのView(struct WebView : UIViewRepresentable)をCallして、表示するURLを引数として渡す。
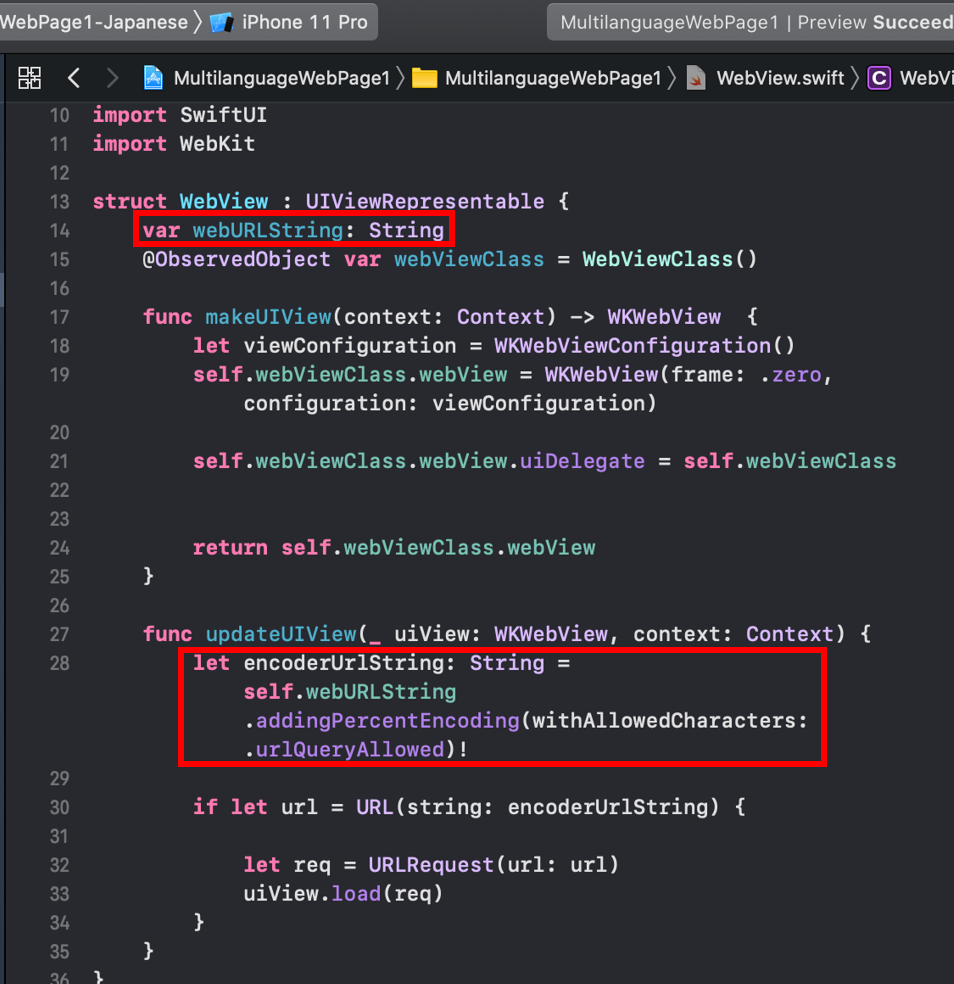
- URLが多言語で記載されている場合があるので、addingPercentEncoding(withAllowedCharacters: .urlQueryAllowed)!としてパーセントエンコーディングを追加して対応する。
実際には、SwiftUIのView表示のためのコードとUIViewRepresentableのWebKit用のコードの2つのSwiftファイルを作成します。実際の例を示します。
import SwiftUI
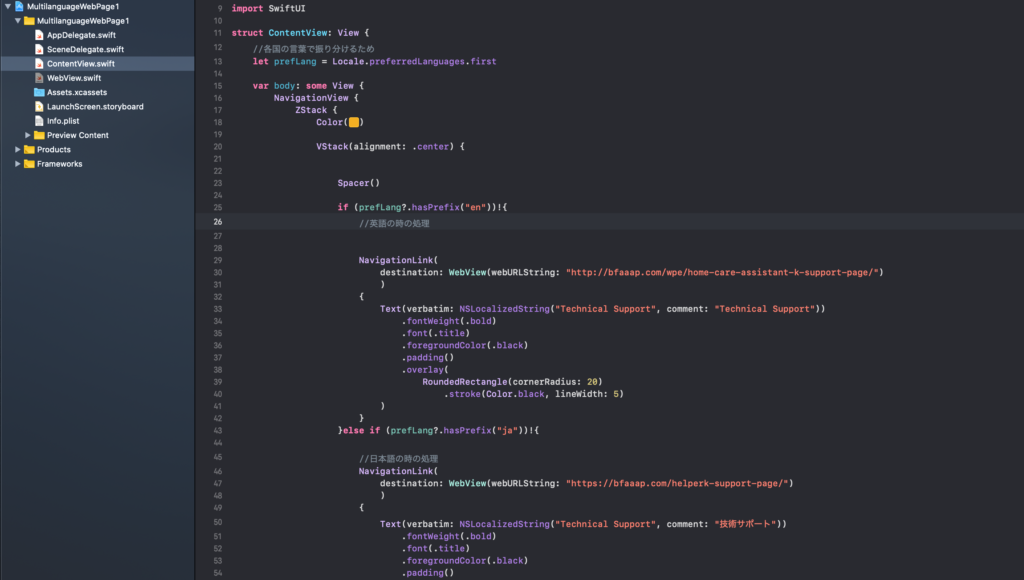
struct ContentView: View {
//各国の言葉で振り分けるため
let prefLang = Locale.preferredLanguages.first
var body: some View {
NavigationView {
ZStack {
Color(#colorLiteral(red: 0.9529411793, green: 0.6862745285, blue: 0.1333333403, alpha: 1))
VStack(alignment: .center) {
Spacer()
if (prefLang?.hasPrefix("en"))!{
//英語の時の処理
NavigationLink(
destination: WebView(webURLString: "http://bfaaap.com/wpe/home-care-assistant-k-support-page/")
)
{
Text(verbatim: NSLocalizedString("Technical Support", comment: "Technical Support"))
.fontWeight(.bold)
.font(.title)
.foregroundColor(.black)
.padding()
.overlay(
RoundedRectangle(cornerRadius: 20)
.stroke(Color.black, lineWidth: 5)
)
}
}else if (prefLang?.hasPrefix("ja"))!{
//日本語の時の処理
NavigationLink(
destination: WebView(webURLString: "https://bfaaap.com/helperk-support-page/")
)
{
Text(verbatim: NSLocalizedString("Technical Support", comment: "技術サポート"))
.fontWeight(.bold)
.font(.title)
.foregroundColor(.black)
.padding()
.overlay(
RoundedRectangle(cornerRadius: 20)
.stroke(Color.black, lineWidth: 5)
)
}
} else if (prefLang?.hasPrefix("de"))!{
//ドイツ語の時の処理
NavigationLink(
destination: WebView(webURLString: "http://bfaaap.com/wpd/haushelferin-k-support-seite/")
)
{
Text(verbatim: NSLocalizedString("Technical Support", comment: "Kundenservice"))
.fontWeight(.bold)
.font(.title)
.foregroundColor(.black)
.padding()
.overlay(
RoundedRectangle(cornerRadius: 20)
.stroke(Color.black, lineWidth: 5)
)
}
} else {
//他言語の時は英語
NavigationLink(
destination: WebView(webURLString: "http://bfaaap.com/wpe/home-care-assistant-k-support-page/")
)
{
Text(verbatim: NSLocalizedString("Technical Support", comment: "Technical Support"))
.fontWeight(.bold)
.font(.title)
.foregroundColor(.black)
.padding()
.overlay(
RoundedRectangle(cornerRadius: 20)
.stroke(Color.black, lineWidth: 5)
)
}
}
Spacer()
}
}
.edgesIgnoringSafeArea(.all)
.navigationBarTitle(Text(verbatim: NSLocalizedString("Support Information", comment: "サポート情報")), displayMode: .inline)
}
}
}
struct ContentView_Previews: PreviewProvider {
static var previews: some View {
ContentView()
}
}

import SwiftUI
import WebKit

struct WebView : UIViewRepresentable {
    var webURLString: String
    @ObservedObject var webViewClass = WebViewClass()

    func makeUIView(context: Context) -> WKWebView  {
        let viewConfiguration = WKWebViewConfiguration()
        self.webViewClass.webView = WKWebView(frame: .zero, configuration: viewConfiguration)

        self.webViewClass.webView.uiDelegate = self.webViewClass


        return self.webViewClass.webView
    }

    func updateUIView(_ uiView: WKWebView, context: Context) {
        let encoderUrlString: String = self.webURLString.addingPercentEncoding(withAllowedCharacters: .urlQueryAllowed)!

        if let url = URL(string: encoderUrlString) {

            let req = URLRequest(url: url)
            uiView.load(req)
        }
    }
}

//webViewClassをclassのobjectとして提供する
final class WebViewClass: UIViewController, ObservableObject, WKUIDelegate{
    @Published var webView: WKWebView!

    func webView(_ webView: WKWebView, createWebViewWith configuration: WKWebViewConfiguration, for navigationAction: WKNavigationAction, windowFeatures: WKWindowFeatures) -> WKWebView? {
        if navigationAction.targetFrame == nil {
            webView.load(navigationAction.request)
        }
        return nil
    }
}
では順番に見ていきましょう。まずは、アプリ内言語環境を検出するLet定数を設定します。
let prefLang = Locale.preferredLanguages.first
そして各国言語を場合分けして処理を記載します。
if (prefLang?.hasPrefix("en"))!{
  //英語
 }else if (prefLang?.hasPrefix("ja"))!{
 //日本語
 } else if (prefLang?.hasPrefix("de"))!{
 //ドイツ語
} else {
  //他言語の時は英語

}
では、言語に合わせてどのようにWebページを表示するかを見ていきましょう。
まずは、Swiftでは、Web表示するためのinfo.plistの設定をする必要があります。ここではApp Transport Security SettingsのArbitrary loadsをYESにして、Exception Domainsに「bfaaap.com(本ホームページ)」を設定します。
SwiftUI ViewからWebKitのUIViewをNavigationで呼ぶための記載は以下のようなものです。この引数としてURLの実際に表示されるStringを渡します(日本語や他の言語が入っている可能性がある)。
NavigationLink(
                            destination: WebView(webURLString: "http://bfaaap.com/wpe/home-care-assistant-k-support-page/")
                            )
そして、UIKitはUIrepresentableで定義しなければ、SwiftUI Viewでは表示できません。そのStructでは2つの関数が必要なprotocolの関数となっていますのでそのように処理します。
    func makeUIView(context: Context) -> WKWebView  {

        return self.webViewClass.webView
    }

    func updateUIView(_ uiView: WKWebView, context: Context) {

    }
この際に、引数として渡した、「webURLString」を下の赤枠内のようにパーセントエンコーディングすることでURLの多言語対応をします。
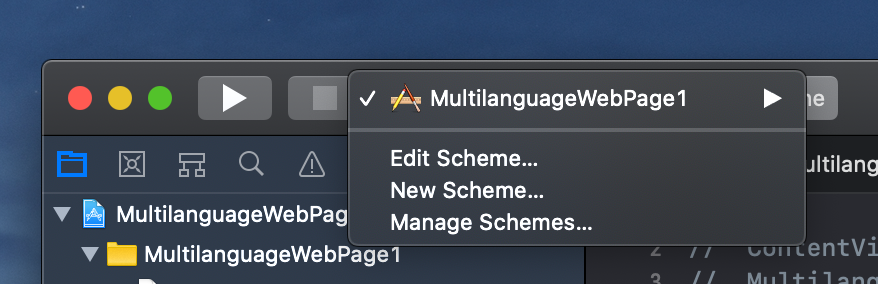
これで、webページの多言語化が出来ました。では、これをどのように多言語で検証するのかを見ていきましょう。キャンバスで各言語で表示させるためには「Scheme」を各言語ごとに作成して、そのSchemeでbuildすることによってキャンバスでもシュミレーターでも各言語でチェックできます。
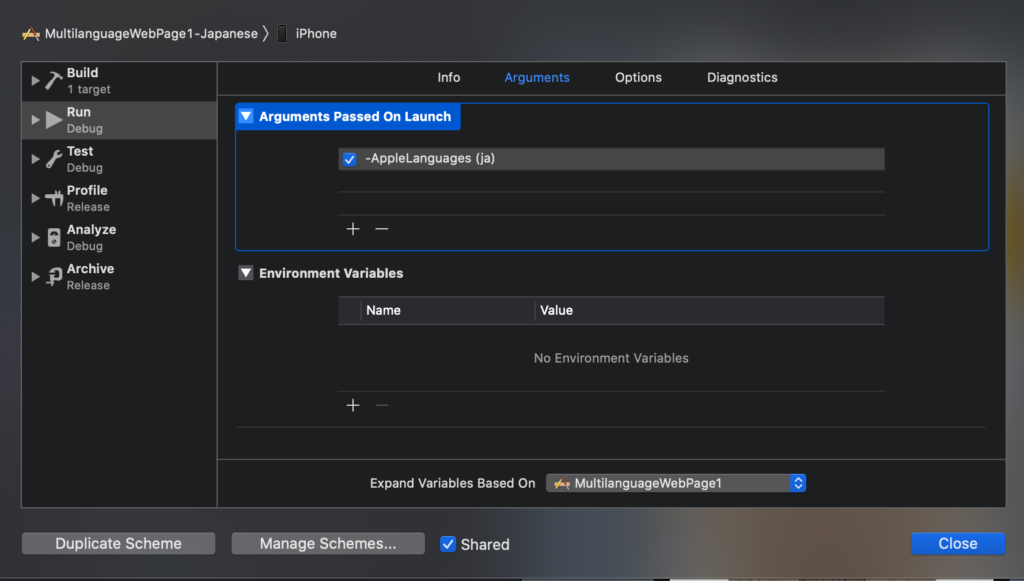
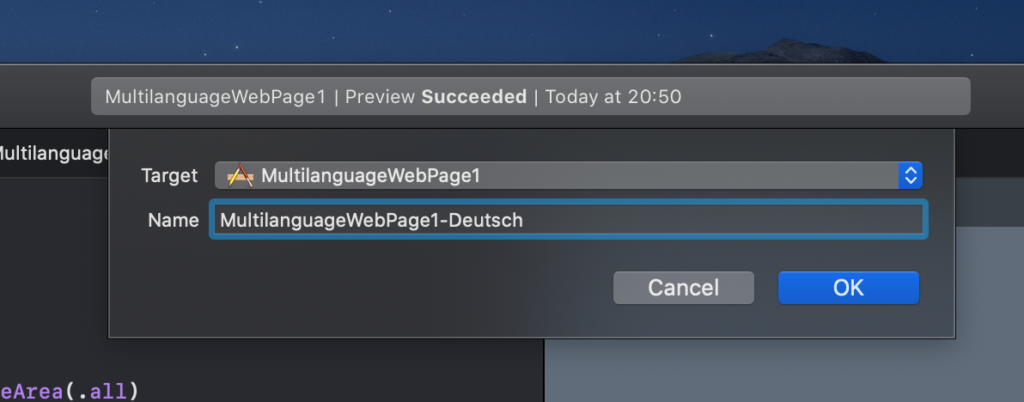
では、Schemeの作成方法です。概略としては、NewSchemeを作成し、EditSchemeからArgumentsに「-AppleLanguages (ja)」(日本語の場合)等を追加します。jaの部分を各国のものにして多言語Schemeを一つずつ作成します。

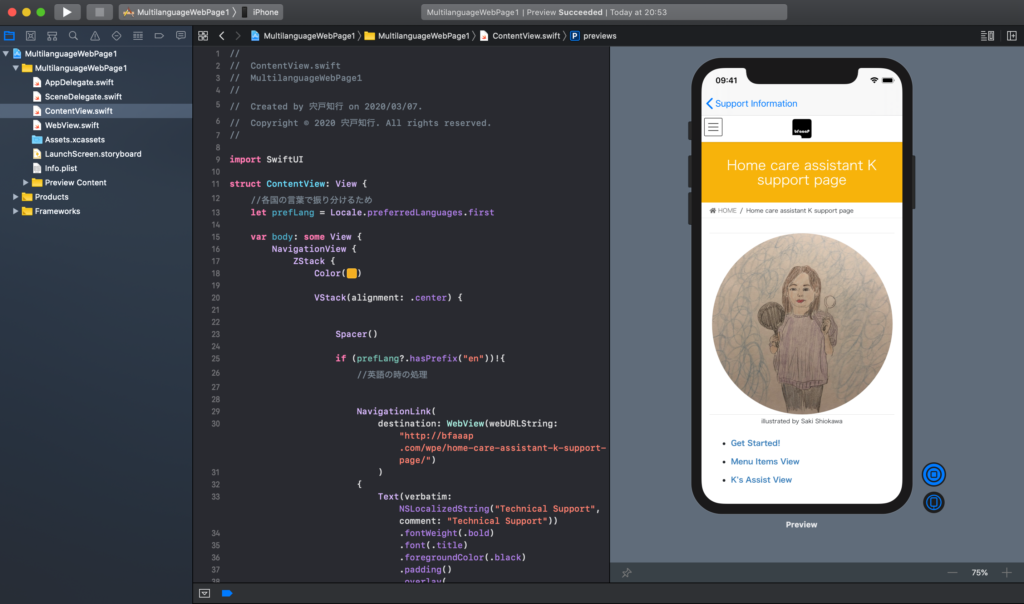
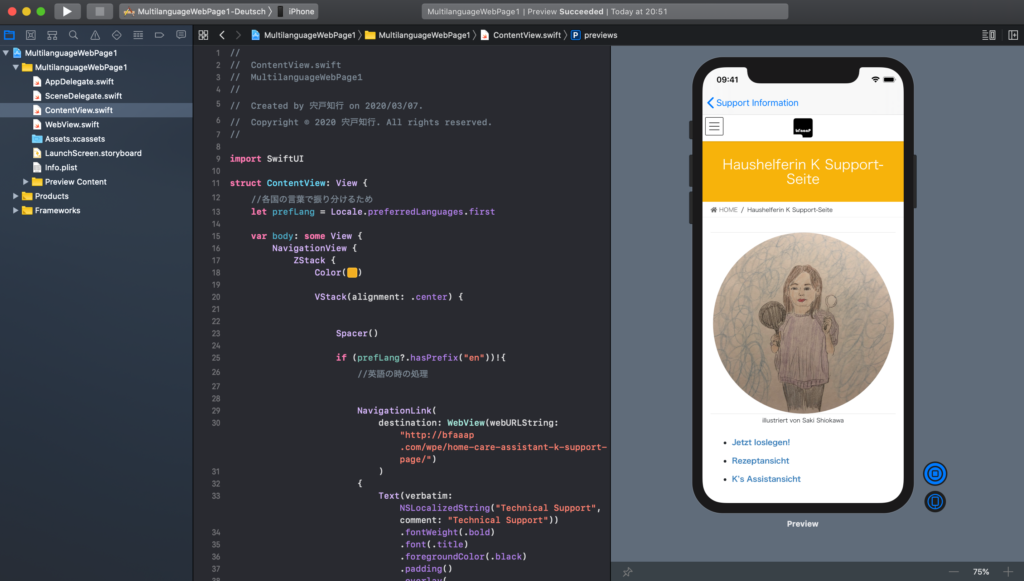
次に、作成したScheme(日本語、ドイツ語、英語)にそれぞれ切り替えてBuildして実際に言語に合わせてWebページに飛ぶのかを確認します(ここでは、アプリ内文字のlocalizationをしていないので、表示は英語ですが、もしlocalizationもしていれば、各国言語に合わせて表示されますよ)。
多言語と言っても私の場合せいぜい英語とドイツ語と日本語ですが、3カ国語のWordPressブログ記事を書くだけで結構精一杯のところがありますね!
コメント