
日本語音声認識のサンプルコードで使用したシステム画像(SF Symbols)とその簡単なアニメーションについて記載します。
お絵かきの才能のない私はアプリで使う画像をどこからか拝借することになります。Appleがその画像サンプルをシステム画像(SF Symbols)として公開してSwiftUIで利用できるようになっています。
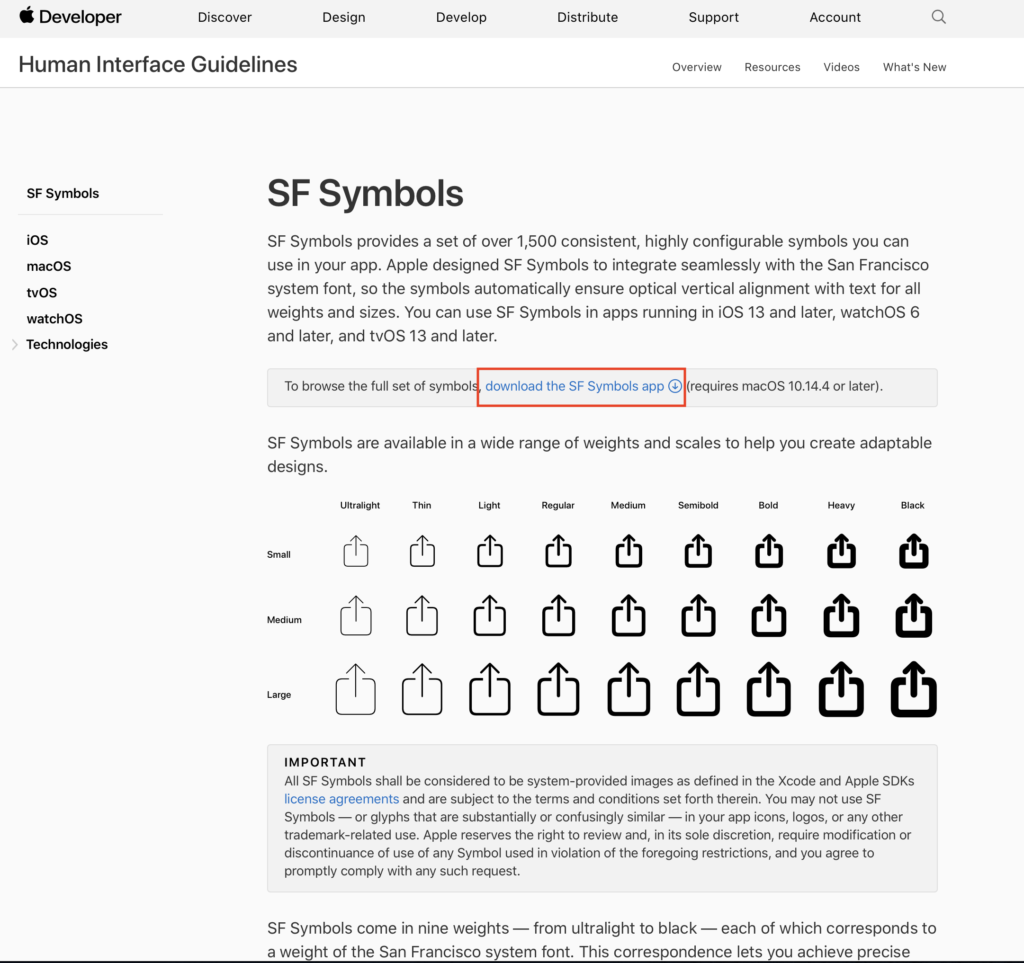
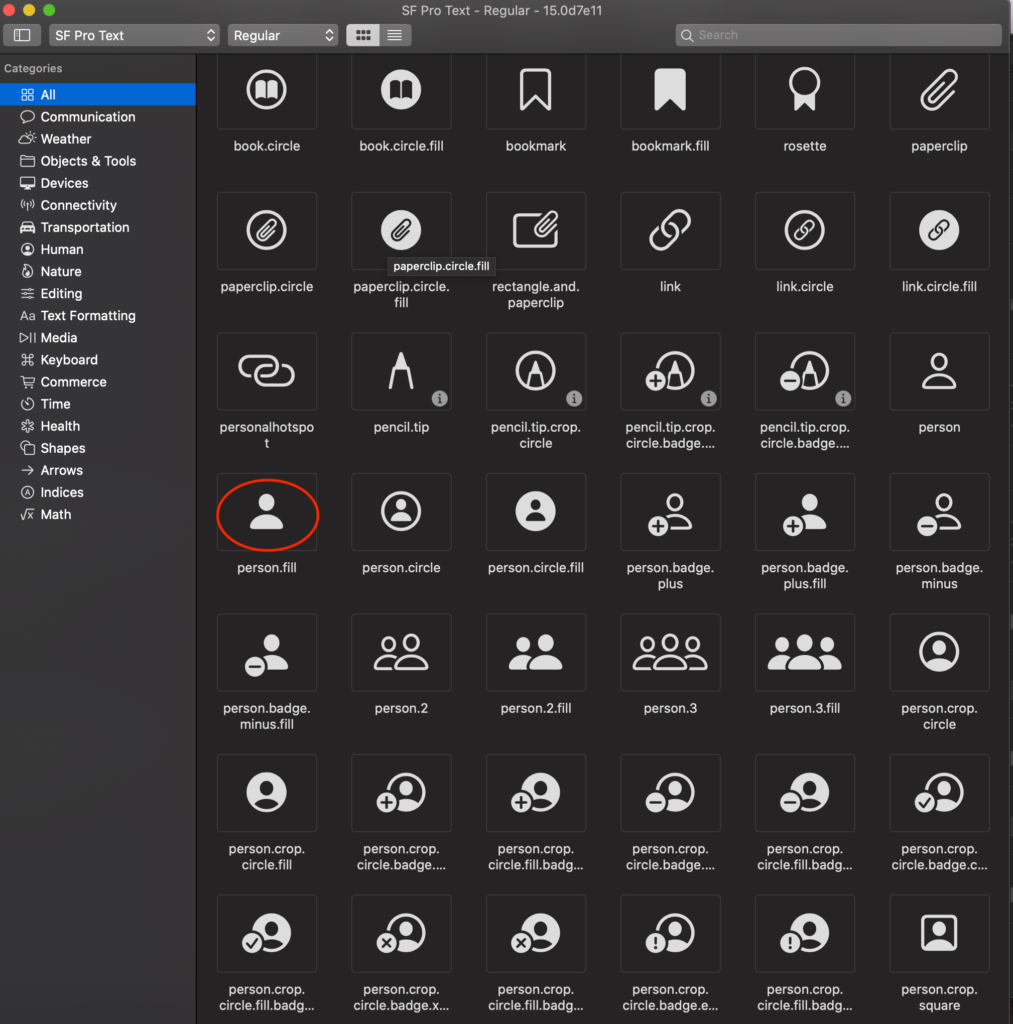
赤枠からダウンロードしてMacにインストールすると以下の様なイメージ群が利用できます(今回利用したヒトの画像を赤丸で示しています)。
簡単なサンプルコードを作成したので、SwiftUI projectを一つ立ち上げて(ここでは、SFSymbolsAndAnimation1としておきました)、ContentView.swiftに以下のコードを貼り付けてビルドしてみてください。
import SwiftUI

struct ContentView: View {

    //ボタンの操作用
    @State private var showAnother = false
    @State private var tapToRequest = false

    var body: some View {
        ZStack{
            Color(#colorLiteral(red: 0.968627451, green: 0.7019607843, blue: 0.03921568627, alpha: 1))
                .edgesIgnoringSafeArea(.all)
            VStack(alignment: .center) {
                Spacer()
                if tapToRequest {
                    Image(systemName: "person.fill")
                        .resizable()
                        .scaledToFit()
                        .frame(width: 150, height: 150, alignment: .center)
                        //animationの効果を入れる
                        .rotationEffect(.degrees(showAnother ? 360 : 0))
                        .scaleEffect(showAnother ? 2 : 1)
                        .transition(.slide)
                        .scaleEffect(tapToRequest ? 1.2 : 1)
                        .animation(.easeInOut(duration: 1.0))

                } else {
                    Image(systemName: "person.fill")
                        .resizable()
                        .scaledToFit()
                        .frame(width: 150, height: 150, alignment: .center)
                        //animationの効果を入れる
                        .rotationEffect(.degrees(showAnother ? 360 : 0))
                        .scaleEffect(showAnother ? 2 : 1)
                        .animation(.easeInOut(duration: 1.0))
                }
                Spacer()

                Button(action: {
                    //Buttonを押した時のactionを記載
                    self.tapToRequest.toggle()


                }) {
                    if !self.tapToRequest {
                        //recordingをstopした時の表示
                        Text(verbatim: NSLocalizedString("タップして話してね", comment: "Tap to Request"))
                            .fontWeight(.bold)
                            .font(.title)
                            .foregroundColor(.black)
                            .padding()
                            .overlay(
                                RoundedRectangle(cornerRadius: 20)
                                    .stroke(Color.black, lineWidth: 5))
                    } else {
                        //recordingを開始する時の表示
                        Text(verbatim: NSLocalizedString("終わったらタップしてね", comment: "Finish Requesting"))
                            .fontWeight(.bold)
                            .font(.title)
                            .foregroundColor(.red)
                            .padding()
                            .overlay(
                                RoundedRectangle(cornerRadius: 20)
                                    .stroke(Color.red, lineWidth: 5))
                    }
                }

                Divider()

                Button(action: {
                    //Buttonを押した時のactionを記載
                    self.showAnother.toggle()

                }) {
                    Text(verbatim: NSLocalizedString("回転します", comment: "to rotate"))
                        .fontWeight(.bold)
                        .font(.title)
                        .foregroundColor(.black)
                        .padding()
                        .overlay(
                            RoundedRectangle(cornerRadius: 20)
                                .stroke(Color.black, lineWidth: 5))
                }
                Spacer()

            }//Vstackの}
                .padding()

        }//ZStackの}

    }
}


struct ContentView_Previews: PreviewProvider {
    static var previews: some View {
        ContentView()
    }
}
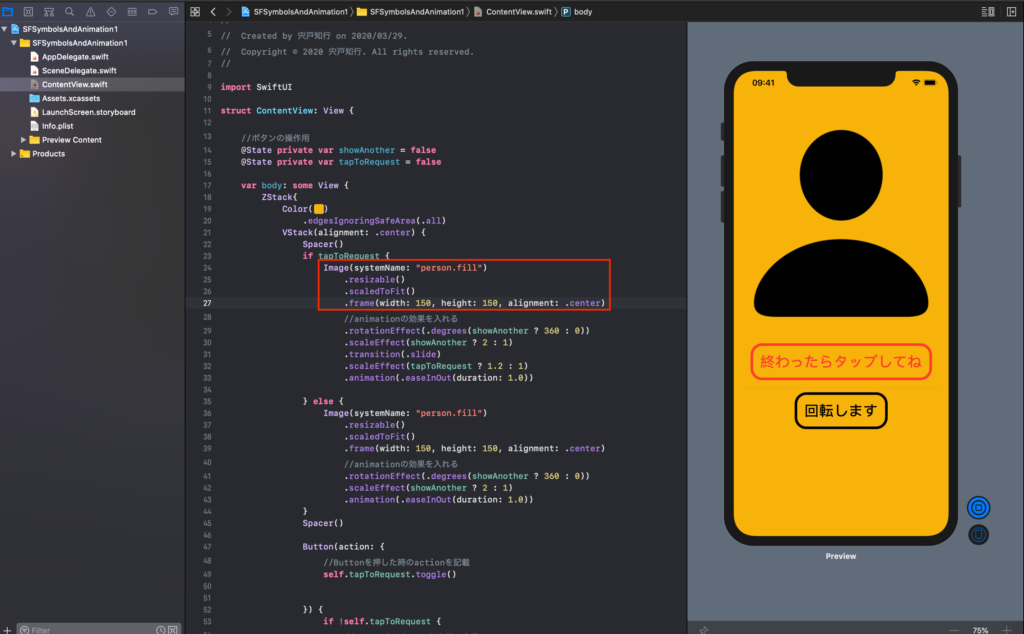
では、まずSF Symbolsの使い方です。下の赤枠の様にsystemName:にSF Symbolsの下にある名前を入れます。そして、好みのframeを設定し、resizable()とscaledToFit()で初期画像の表示ができます。
そして、ボタンが押された際に簡単なアニメーション(1.ちょっとだけ大きくなって横方向からslideして入って出ていくものと2.大きさが変わって回転するもの)のやり方のコードです。
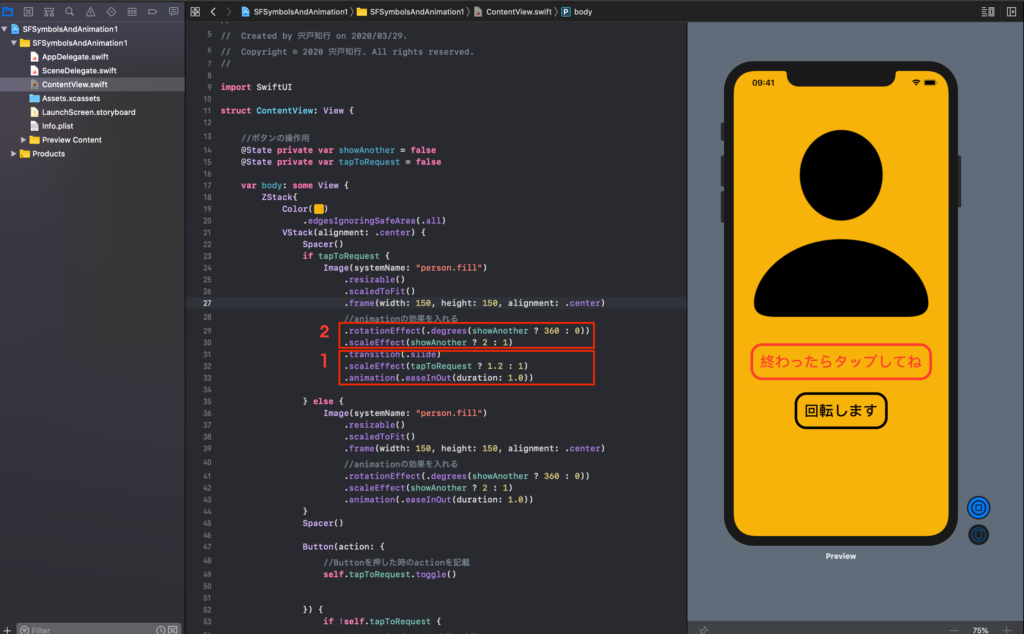
このscaleEffect(showAnother ? 2 : 1)の”?”はフラグ(showAnother)がtrueの時に2、falseの時に1という場合分けをしてくれる便利なものですよ。
コメント