
ヘルパーKアプリでは、日本語、英語、ドイツ語で会話しながら、おすすめのメニューを表示したり、ヘルパーKと雑談できるようにプログラミングしています。
アルゴリズムとしては、
- 各言語で音声認識をして、ユーザーの言葉を認識して、文章を保存する。
- 文章を単語単位(token)に分解する。
- フィルターをかける(例、日本語ではひらがな1文字または2文字を除外)。
- 選抜した用語( words )を保存する。
- JSON形式で用意した各メニューアイテムのタイトルと内容に選抜した用語が該当するかどうかを利用して、各メニューアイテムのスコアリングを行う。
- スコアリングによって、メニューアイテムの表示優先順位をつけて、その配列の並べ替えを行う。
- その順位に合わせてメニューを表示する。
- また、Wordsが用意したWordsに該当するかどうかを判定して、該当するKeysordsの配列を作る。
- そのkeywordsをランダムに入れ替えて、そのKeywordに対応するAudio(日本語、英語、ドイツ語)を流す。
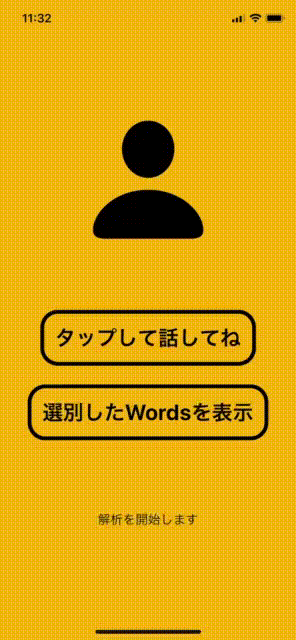
このうち、今日は日本語で音声認識をして、その会話内容から単語単位を取り出し、フィルターをかけて、選抜した用語(words)を取り出し、その用語をリスト表示する部分までのプログラムを紹介いたします。こんな感じですよ。
では、projectの準備です。まず、SwiftUIのプロジェクトを一つ作ってください(やり方は、Googleでググるといっぱい出てきますよ)。タイトルはなんでもいいですが、私は「SpeechAnalyzer1」としました。
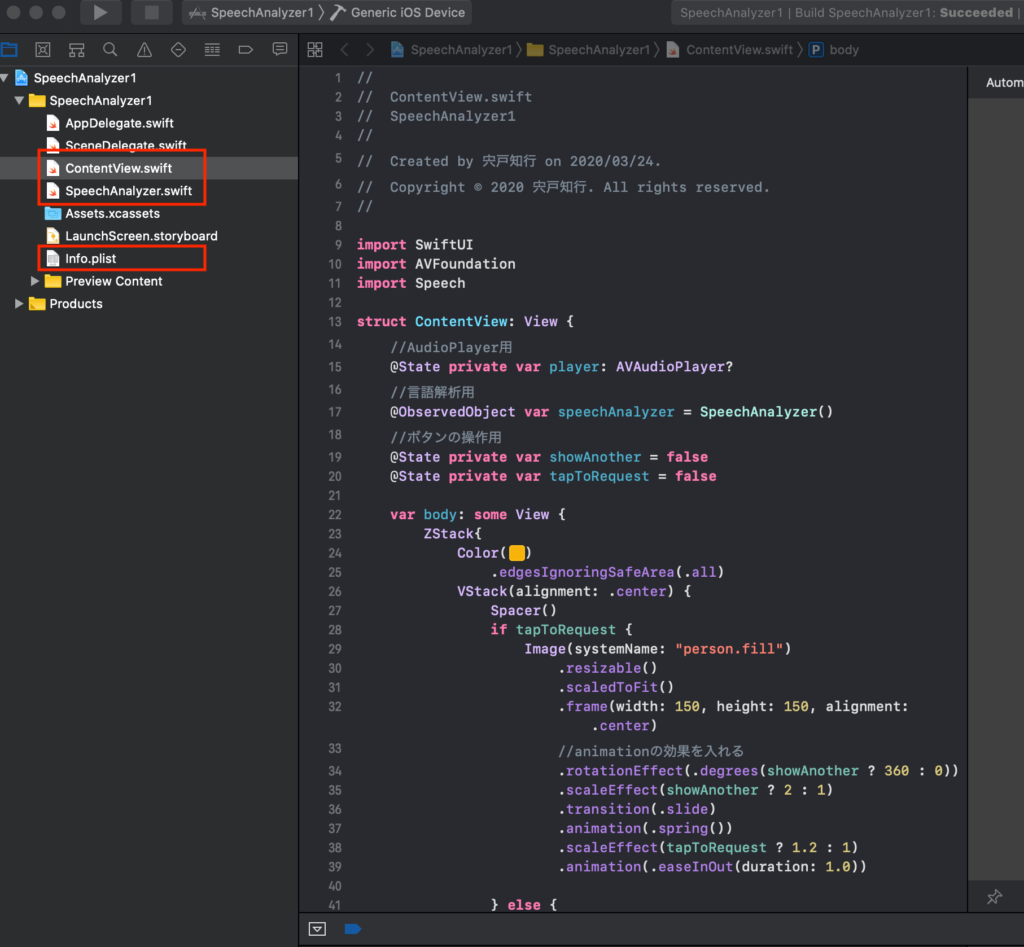
ここでは、上の図で赤で囲った、3つのファイルを編集します。
最初に、Info.plistを編集します。「+」ボタンを押して、「Privacy Microphone Usage Description」と「Privacy Speech Recognition Usage」のValueに何か文言を適当に入れます。

次に、ContentView.swiftに次のコードをコピペします。
//
//  ContentView.swift
//  SpeechAnalyzer1
//
//  Created by 宍戸知行 on 2020/03/24.
//  Copyright © 2020 宍戸知行. All rights reserved.
//

import SwiftUI
import AVFoundation
import Speech

struct ContentView: View {
    //AudioPlayer用
    @State private var player: AVAudioPlayer?
    //言語解析用
    @ObservedObject var speechAnalyzer = SpeechAnalyzer()
    //ボタンの操作用
    @State private var showAnother = false
    @State private var tapToRequest = false

    var body: some View {
        ZStack{
            Color(#colorLiteral(red: 0.968627451, green: 0.7019607843, blue: 0.03921568627, alpha: 1))
                .edgesIgnoringSafeArea(.all)
            VStack(alignment: .center) {
                Spacer()
                if tapToRequest {
                    Image(systemName: "person.fill")
                        .resizable()
                        .scaledToFit()
                        .frame(width: 150, height: 150, alignment: .center)
                        //animationの効果を入れる
                        .rotationEffect(.degrees(showAnother ? 360 : 0))
                        .scaleEffect(showAnother ? 2 : 1)
                        .transition(.slide)
                        .animation(.spring())
                        .scaleEffect(tapToRequest ? 1.2 : 1)
                        .animation(.easeInOut(duration: 1.0))

                } else {
                    Image(systemName: "person.fill")
                        .resizable()
                        .scaledToFit()
                        .frame(width: 150, height: 150, alignment: .center)
                        //animationの効果を入れる
                        .rotationEffect(.degrees(showAnother ? 360 : 0))
                        .scaleEffect(showAnother ? 2 : 1)
                        .animation(.easeInOut(duration: 1.0))
                }
                Spacer()

                Button(action: {
                    //Buttonを押した時のactionを記載
                    self.tapToRequest.toggle()

                    //録音開始時にSpeechAnalyzerのtextとgivenKeywordsを初期化
                    if  self.speechAnalyzer.recordingControl == true {
                        //SpeechAnalyzerのtextを初期化する
                        self.speechAnalyzer.text = ""
                    }//if 文の}
                    //録音操作の実行
                    self.speechAnalyzer.micButtonTapped()

                    //録音操作後の処理
                    if  self.speechAnalyzer.recordingControl == false {
                        DispatchQueue.main.asyncAfter(deadline: .now() + 2.5) {
                            if self.speechAnalyzer.text == "" {

                                self.speechAnalyzer.text = NSLocalizedString("解析を開始します", comment: "Start analysis")
                            }//text == ""の終わりの}
                        }//DispatchQueueの終わりの }
                    }// recordingControlがfalseの場合のif文の}
                }) {
                    if !self.speechAnalyzer.recordingControl {
                        //recordingをstopした時の表示
                        Text(verbatim: NSLocalizedString("タップして話してね", comment: "Tap to Request"))
                            .fontWeight(.bold)
                            .font(.title)
                            .foregroundColor(.black)
                            .padding()
                            .overlay(
                                RoundedRectangle(cornerRadius: 20)
                                    .stroke(Color.black, lineWidth: 5))
                    } else {
                        //recordingを開始する時の表示
                        Text(verbatim: NSLocalizedString("終わったらタップしてね", comment: "Finish Requesting"))
                            .fontWeight(.bold)
                            .font(.title)
                            .foregroundColor(.red)
                            .padding()
                            .overlay(
                                RoundedRectangle(cornerRadius: 20)
                                    .stroke(Color.red, lineWidth: 5))
                    }
                }

                Divider()

                Button(action: {
                    //Buttonを押した時のactionを記載
                    self.showAnother.toggle()

                }) {
                    Text(verbatim: NSLocalizedString("選別したWordsを表示", comment: "Selected Words"))
                        .fontWeight(.bold)
                        .font(.title)
                        .foregroundColor(.black)
                        .padding()
                        .overlay(
                            RoundedRectangle(cornerRadius: 20)
                                .stroke(Color.black, lineWidth: 5))
                }
                Spacer()
                //一時的にspeechAnalyzerのtextを表示するためのもの
                Text(self.speechAnalyzer.text)

                if self.showAnother {
                    //selectedWordsをリスト表示する
                    List {
                        if self.speechAnalyzer.selectedWords.count > 0{
                            ForEach(0..<self.speechAnalyzer.selectedWords.count, id: \.self){ item in
                                    Text(self.speechAnalyzer.selectedWords[item])
                                        .bold()
                                        .font(.title)
                            }
                            .listRowBackground(Color(#colorLiteral(red: 0.501960814, green: 0.501960814, blue: 0.501960814, alpha: 1)))
                        }
                    }


                }//showAnotherのFlagの最後の}
                Spacer()
            }//Vstackの}
                .padding()

        }//ZStackの}
            .onAppear{
                //アナウンス後に録音装置の初期設定
                //speechRecognizer.delegate = self
                SFSpeechRecognizer.requestAuthorization { (status) in
                    OperationQueue.main.addOperation {
                        switch status {
                        case .authorized:   // 許可OK
                            print("Authorized")
                        case .denied:       // 拒否
                            print ("Not authorized")
                        case .restricted:   // 限定
                            print ("Not authorized")
                        case .notDetermined:// 不明
                            print ("Not determined")
                        @unknown default:
                            print("errors in recording")
                        }
                    }
                }//録音装置の初期設定の}

        }
    }
}

struct ContentView_Previews: PreviewProvider {
    static var previews: some View {
        ContentView()
    }
}
そして、Swift.fileを新たに作り、ここでは「SpeechAnalyzer.swift」とします。そして、そこに以下のコードをコピペします。
//
//  SpeechAnalyzer.swift
//  SpeechAnalyzer1
//
//  Created by 宍戸知行 on 2020/03/24.
//  Copyright © 2020 宍戸知行. All rights reserved.
//

import Foundation
import Combine
import AVFoundation
import Speech
import NaturalLanguage


final class SpeechAnalyzer: ObservableObject {
    //   @State private var player: AVAudioPlayer?

    //localeは、ja-JP, en-US, de-DE
    private var speechRecognizer = SFSpeechRecognizer(locale: Locale(identifier: "ja-JP"))!
    private var recognitionRequest: SFSpeechAudioBufferRecognitionRequest?
    private var recognitionTask: SFSpeechRecognitionTask?
    private let audioEngine = AVAudioEngine()

    @Published var text: String = NSLocalizedString("解析を開始します", comment: "Start Analysis")

    @Published var recordingControl: Bool = false

    //テキスト処理用の変数

    var words = [String]()
    @Published var selectedWords = [String]()

    let tagger = NLTagger(tagSchemes: [.lexicalClass, .language])
    let options: NLTagger.Options = [.omitPunctuation, .omitWhitespace]

    func micButtonTapped(){
        //wordsとselectedWordsも初期化
        self.words = [String]()
        self.selectedWords = [String]()
        //recordingの状態に合わせて処理
        if audioEngine.isRunning {
            // 音声エンジン動作中なら停止
            audioEngine.stop()
            recognitionRequest?.endAudio()
            recordingControl = false
            //audioをplaysessionに戻す
            let audioSession = AVAudioSession.sharedInstance()
            do {
                try audioSession.setCategory(AVAudioSession.Category.playback)
                try audioSession.setMode(AVAudioSession.Mode.default)
            } catch{
                print("audio session error")
            }
            return
        }
        // 録音を開始する
        try! startRecording()
        recordingControl =  true

    }

    func startRecording() throws {
        //日本語の時の処理
        self.speechRecognizer = SFSpeechRecognizer(locale: Locale(identifier: "ja-JP"))!
        // Cancel the previous task if it's running.
        recognitionTask?.cancel()
        self.recognitionTask = nil

        // Configure the audio session for the app.
        let audioSession = AVAudioSession.sharedInstance()
        try audioSession.setCategory(.record, mode: .measurement, options: .duckOthers)
        try audioSession.setActive(true, options: .notifyOthersOnDeactivation)
        let inputNode = audioEngine.inputNode

        //After test == "" at the previous recognition session, the speech recognition did not function.
        //  self.audioEngine.stop()
        //  try self.audioEngine.start()
        inputNode.removeTap(onBus: 0) //this can avoid the following error:Terminating app due to uncaught exception 'com.apple.coreaudio.avfaudio', reason: 'required condition is false: _recordingTap == nil'
        self.recognitionTask = SFSpeechRecognitionTask()

        self.text = NSLocalizedString("解析中です", comment: "Being analyzed")


        // Create and configure the speech recognition request.
        recognitionRequest = SFSpeechAudioBufferRecognitionRequest()
        guard let recognitionRequest = recognitionRequest else { fatalError("Unable to create a SFSpeechAudioBufferRecognitionRequest object") }
        recognitionRequest.shouldReportPartialResults = true

        // Keep speech recognition data on device
        if #available(iOS 13, *) {
            recognitionRequest.requiresOnDeviceRecognition = false
        }

        // Create a recognition task for the speech recognition session.
        // Keep a reference to the task so that it can be canceled.
        recognitionTask = speechRecognizer.recognitionTask(with: recognitionRequest) { result, error in
            var isFinal = false

            if let result = result {
                // ***We will update State here!***
                // ??? = result.bestTranscription.formattedString
                isFinal = result.isFinal
                self.text = result.bestTranscription.formattedString
                print("Text \(result.bestTranscription.formattedString)")
            }

            //error処理と先にtext=""を処理する:textはoptionalではないがnullが代入されているようなので処理を中断することにする

            guard error == nil else {
                print ("RecognitionTaskにError(\(String(describing: error)))がでました。")

                /* Error Domain=kAFAssistantErrorDomain Code=209 “(null)”エラー解決法*/
                self.recognitionTask?.cancel()
                self.recognitionTask?.finish()


                return
            }


            if  isFinal {  //if error != nil || isFinal
                //先にrecognition task を止める
                self.recognitionRequest = nil
                self.recognitionTask = nil
                //次にaudioEngineを止める
                self.audioEngine.stop()
                inputNode.removeTap(onBus: 0)
                print("error != nil || isFinal通過後のtextは(\(self.text))です。")

                //textに文字列が入っていれば入力文書を解析してWordsに追加する
                //日本語、英語、ドイツ語で分岐する
                //日本語の時の処理
                print ("日本語の処理開始")
                if self.text != "" {
                    self.tagger.string = self.text
                    self.tagger.enumerateTags(in: self.text.startIndex..<self.text.endIndex, unit: .word, scheme: .lexicalClass, options: self.options) { tag, tokenRange in

                        //各wordの品詞を表示(LexicalClass)
                        if let tag = tag {

                            print("\(self.text[tokenRange]): \(tag.rawValue)")
                            let tagWord = self.text[tokenRange]
                            self.words.append(String(tagWord))


                        }
                        return true
                    }
                }


                //wordsをプリントする
                print("wordsは、\(self.words)です。")


                //selectedWordsを初期化
                self.selectedWords = [String]()

                //言語によって分岐する必要がある英語とドイツ語はNoun,Verb, Adjectiveの場合に処理する

                //日本語の場合ひらがな1または2文字以外をselectedWordsに追加する
                for word in self.words {
                    if word.count > 2 {
                        self.selectedWords.append(word)
                    } else if word.count == 2 {
                        let hiraganaRegEx = "^[ぁ-ゞ]+$"
                        let hiraganaTest = NSPredicate(format:"SELF MATCHES %@", hiraganaRegEx)
                        let hiraganaFlag = hiraganaTest.evaluate(with: word)
                        if hiraganaFlag == false {
                            self.selectedWords.append(word)
                        }

                    } else if word.count == 1 {
                        let hiraganaRegEx = "^[ぁ-ゞ]+$"
                        let hiraganaTest = NSPredicate(format:"SELF MATCHES %@", hiraganaRegEx)
                        let hiraganaFlag = hiraganaTest.evaluate(with: word)
                        if hiraganaFlag == false {
                            self.selectedWords.append(word)
                        }

                    }

                }

                //selectedWorsをプリント
                print("selectedWordsは、\(self.selectedWords)です。")
                //選択されたwordsでitemsをscoringしてsortingする

                //      self.scoring(with: self.selectedWords)

                //配列をSortingする
                //      self.itemsForSorting.sort{$0.score > $1.score}


            }
        }

        // Configure the microphone input.
        let recordingFormat = inputNode.outputFormat(forBus: 0)
        inputNode.installTap(onBus: 0, bufferSize: 1024, format: recordingFormat) { (buffer: AVAudioPCMBuffer, when: AVAudioTime) in
            self.recognitionRequest?.append(buffer)
        }

        audioEngine.prepare()
        try audioEngine.start()
    }


}
これで準備完了です。音声認識は実機でしか機能しないので、実機にビルドして動かしてみてください。
当初、ヘルパーKの音声解析はバグがあって、苦戦しました。主に、認識したテキストが空の場合にエラーが出てしまうことと、ドイツ語の音声認識がどうしてもエラーが出てしまいました。前者は解決したのですが、後者のドイツ語は「 Apple Technical Support」に問い合わせしました。結局のところ、システムエラーでiOSのバージョンが上がって新しいXcodeでビルドして解決しました。
ですので、バグ取りの残骸が少し残っていますが、もしかしたら、この部分は同じ様なエラーが出た際に誰かの役に立つかもしれません。
次回は、概略ですが、音声認識コードの内容と、SwiftUIでclassのオブジェクトをどの様に取り扱うとSwiftUIのViewから制御できるかを少し話してみようかなと思います。
コメント